Author: chilca

  • How to Create a School Website

    How to Create a School Website

    Having a well-designed and functional website for a school is essential. A school website serves as the digital face of the institution, offering vital information to students, parents, and teachers. A well-structured website enhances communication, provides easy access to school news, event calendars, and important documents, and can also be a great tool for promoting the school’s activities and achievements.

    This article will provide a step-by-step guide on how to create a school website, from planning and design to launching and maintaining the site.

    1. Understand the Purpose of the School Website

    Before starting any design or technical work, it’s important to clearly define the goals of the website. Understanding the purpose will guide your decisions throughout the development process. Some common purposes for a school website include:

    • Communication: The website should provide a platform for communicating with students, parents, and staff. This may include announcements, news, newsletters, and school updates.
    • Information Hub: The website should serve as a central point for important documents, school policies, event calendars, class schedules, and contact information.
    • Promotion: Schools can use the website to promote their achievements, extracurricular activities, academic programs, and overall culture.
    • Interactive Features: Providing interactive elements such as online forms, portals for students and parents, and school discussion forums can make the website more useful.

    2. Plan the Structure and Design

    Once you have a clear understanding of your website’s purpose, it’s time to plan the structure and design. A school website should be easy to navigate and visually appealing. Here are some key elements to include:

    a. Key Pages and Features

    • Home Page: This should provide a welcoming introduction to the school, showcasing its values, vision, and mission. It should also feature links to important sections of the website.
    • About Us: This page should provide information about the history of the school, the staff, and the academic programs offered.
    • Academic Programs: Provide details about the curriculum, subjects, and special educational programs available at the school.
    • News and Events: A dedicated section for school news, upcoming events, and announcements. This page can be kept updated regularly to keep the community informed.
    • Admissions: Include important information for prospective students and parents, including admission requirements, deadlines, and how to apply.
    • Parents and Students Portal: This is an essential feature for facilitating communication and providing a centralized location for accessing grades, assignments, and other important resources.
    • Contact Information: Ensure that there is a page with school contact details, location on a map, and a contact form for inquiries.

    b. Design and User Experience (UX)

    • Mobile-Friendly Design: Many people will access the website from their mobile phones, so ensure that the website is responsive and adapts to various screen sizes.
    • Clean and Simple Design: Avoid cluttered layouts and make sure that the website is easy to read and navigate. Use school colors, logos, and other branding elements to maintain consistency.
    • Accessible Navigation: The website should have a straightforward navigation menu that allows users to easily find the information they need.
    • Multilingual Options: If your school serves a diverse community, consider adding multilingual support to cater to non-English speaking parents and students.

    3. Choose the Right Platform

    There are several ways to create a school website, but choosing the right platform will make the process easier and more manageable. Some popular website-building platforms include:

    a. Content Management Systems (CMS)

    • WordPress: One of the most popular platforms for building websites, WordPress offers a range of themes and plugins specifically designed for schools. It is user-friendly and highly customizable.
    • Wix: Wix is another easy-to-use website builder that offers templates specifically for schools. It also has drag-and-drop features, making it perfect for beginners.
    • Squarespace: Known for its visually appealing designs, Squarespace offers a range of templates that work well for school websites. It is an excellent choice if aesthetics are a priority.
    • Joomla: Joomla is another open-source CMS that offers flexibility and scalability. It’s suitable for more complex school websites that may require custom features.
    • Drupal: While not as beginner-friendly as WordPress, Drupal is a robust and flexible CMS that is ideal for larger educational institutions with advanced needs.

    b. Website Builders for Schools

    If you’re looking for an easy, hassle-free option, website builders like Weebly and SiteGround offer specialized services for schools. These platforms are perfect for those who don’t have a lot of web development experience but still want to create a professional-looking site.

    4. Develop the Website

    Now that you’ve chosen a platform, it’s time to build your website. If you’re using a website builder, many of the tasks, such as selecting a template and customizing it, are fairly straightforward. However, if you are using a CMS like WordPress or Joomla, you will need to:

    • Install Themes and Plugins: Choose a school-specific theme, and install plugins that add additional functionality (e.g., event calendars, student portals).
    • Add Content: Start adding the pages and content you planned in the previous step. Ensure the content is organized, clear, and informative.
    • Optimize for SEO: Search Engine Optimization (SEO) is crucial for making your website visible to search engines. Use keywords that parents and students might search for, and optimize page titles, descriptions, and images.

    5. Implement Interactive Features

    Interactive elements can greatly enhance the usefulness of your school website. Consider adding features such as:

    • Online Forms: For applications, inquiries, or feedback from parents, students, or staff.
    • Student/Parent Portals: Provide access to academic resources, attendance records, grades, and assignments.
    • Event Calendar: A calendar where upcoming school events, parent-teacher meetings, and holidays are listed.
    • Blog/News Section: Keep the community updated with a blog where school events, success stories, and news can be shared.
    • Live Chat Support: Consider adding a live chat feature for instant communication with students or parents who have questions.

    6. Test the Website

    Before launching your website, it’s essential to test it thoroughly to ensure that everything is functioning correctly. Test the following aspects:

    • Functionality: Ensure that all links, buttons, forms, and interactive features are working properly.
    • Mobile Responsiveness: Check how the website looks and performs on different devices, including smartphones and tablets.
    • Load Speed: A slow website can drive users away. Test your site’s speed and optimize images or elements that may be slowing it down.
    • Accessibility: Make sure your website is accessible to all users, including those with disabilities. This can include adding alt text for images, ensuring contrast is readable, and offering keyboard navigation.
    • Cross-Browser Compatibility: Check how your website looks on different web browsers (Chrome, Firefox, Safari, etc.) to ensure a consistent experience.

    7. Launch the Website

    Once you’ve tested the website and made necessary improvements, it’s time to launch it. Before going live, ensure that the website is connected to a reliable web hosting service, and the domain name (e.g., www.yourschoolname.com) is registered and properly configured.

    • Announce the Launch: Inform students, parents, and staff about the new website through emails, social media, and printed notices.
    • Monitor the Launch: Keep an eye on the website’s performance and fix any issues that arise after launch.

    8. Regular Maintenance and Updates

    A school website requires ongoing maintenance to ensure it remains functional and up-to-date. Some tasks include:

    • Updating Content: Regularly update the website with news, events, announcements, and any changes to policies or schedules.
    • Security Updates: Ensure that the platform, themes, and plugins you’re using are updated regularly to prevent security breaches.
    • Performance Monitoring: Periodically check the website’s load speed and user experience to ensure it remains fast and functional.
    • Backup: Regularly back up the website to avoid losing any critical data in case of technical issues.

    Conclusion

    Creating a school website is an important step in improving communication, providing useful information, and promoting the institution to students, parents, and the community. By planning effectively, choosing the right platform, and maintaining the website regularly, you can ensure that the website serves its purpose and is a valuable tool for your school. Whether you’re building it yourself or working with a developer, this comprehensive guide will help you navigate the process of creating a functional, attractive, and informative school website.

  • How to Create a Travel Website

    How to Create a Travel Website

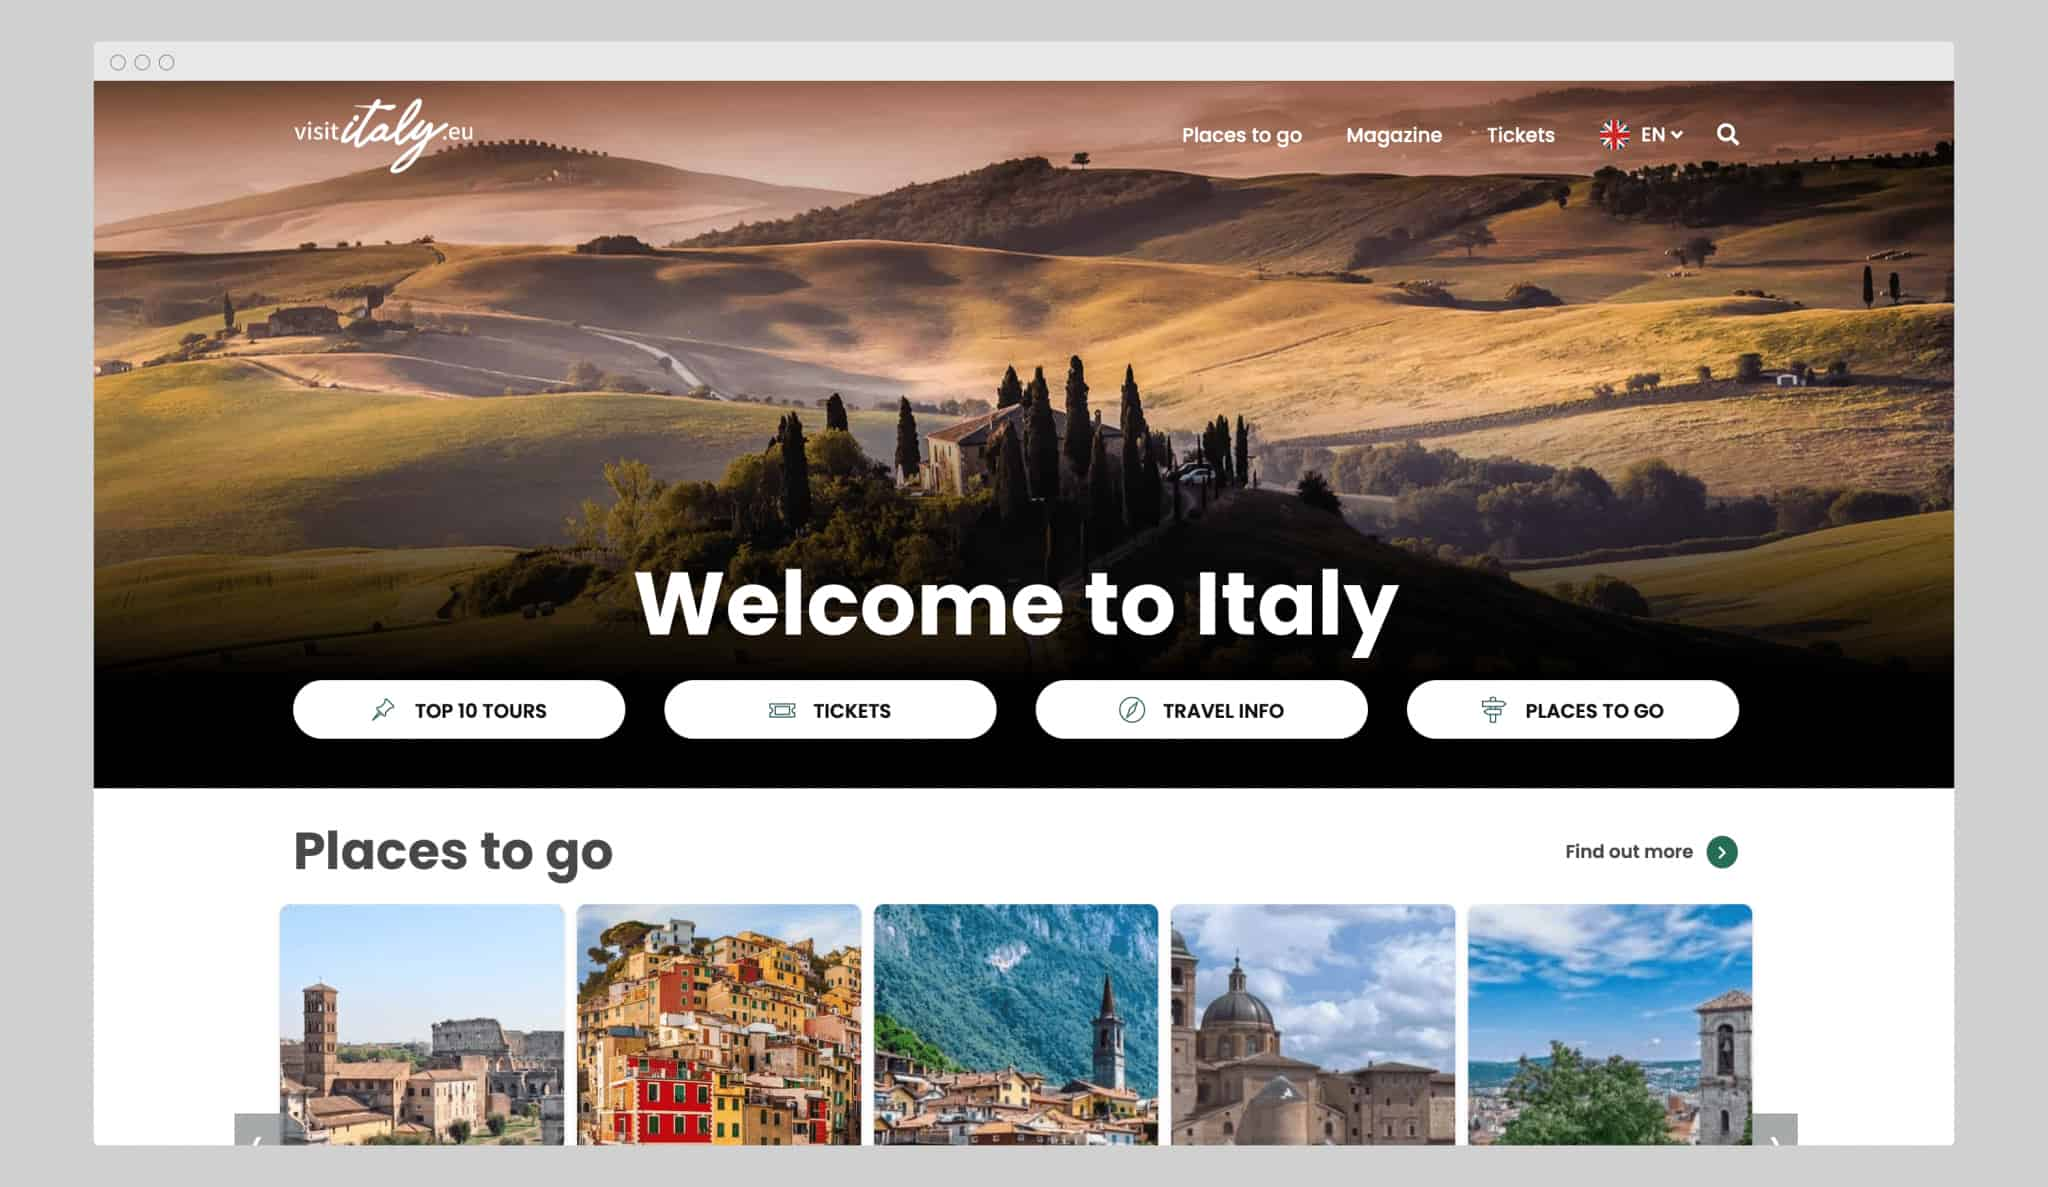
    Creating a travel website is one of the best ways to share your love for travel, provide valuable information, and even build a business around your passion. Whether you’re an independent traveler, a travel agent, or a tour operator, having a well-designed and informative website can help you reach your target audience and stand out in a competitive market. In this article, we will guide you through the entire process of creating a travel website, from planning your site to launching it and promoting it effectively.

    1. Define Your Niche

    The first step in creating a successful travel website is determining your niche. The travel industry is vast, and it’s important to narrow down your focus so that you can tailor your content to a specific audience. Some examples of travel website niches include:

    • Adventure Travel: Focus on outdoor adventures such as hiking, trekking, or extreme sports.
    • Luxury Travel: Cater to travelers seeking high-end experiences and luxury destinations.
    • Budget Travel: Share tips for budget-friendly travel and affordable destinations.
    • Family Travel: Offer recommendations and itineraries for family-friendly vacations.
    • Solo Travel: Share advice for solo travelers looking to explore the world on their own.
    • Eco-Tourism: Focus on sustainable travel and environmentally-friendly destinations.

    Once you have defined your niche, it will be easier to create content that speaks directly to your audience and builds your brand.

    2. Choose a Domain Name and Hosting

    Your domain name is the foundation of your website’s identity. It should be memorable, easy to spell, and relevant to your niche. Try to keep it short and avoid complex words or phrases. Some tips for choosing a domain name include:

    • Use keywords related to travel, such as “explore,” “journey,” “adventure,” or “tour.”
    • Consider including your brand name or your niche in the domain.
    • Choose a .com domain, as it’s the most widely recognized, but you can also opt for other extensions like .travel or .io if it fits your brand.

    Once you’ve decided on a domain name, the next step is choosing a web hosting provider. Hosting is where your website’s files will be stored, and it’s crucial to select a reliable provider to ensure your site runs smoothly. Popular hosting providers include:

    • Bluehost: Known for its user-friendly interface and excellent customer service.
    • SiteGround: Offers fast performance and excellent security features.
    • HostGator: A popular option for those starting out with affordable pricing.
    • InMotion Hosting: A great choice for growing travel websites with advanced features.

    Most hosting providers offer easy domain registration as part of their hosting packages. Once you have your domain name and hosting, you’re ready to set up your website.

    3. Choose a Website Builder

    Unless you’re a web developer with coding expertise, using a website builder is the easiest way to create a travel website. Website builders are user-friendly platforms that allow you to create a professional-looking website without writing a single line of code. Some popular website builders include:

    • WordPress: The most popular content management system (CMS) in the world, WordPress offers flexibility, a wide range of plugins, and thousands of customizable themes. WordPress is great for travel blogs, online travel agencies, and tourism websites.
    • Wix: Known for its drag-and-drop functionality, Wix allows you to build a website without any technical knowledge. It’s a good option for small travel blogs or personal travel websites.
    • Squarespace: Offers elegant design templates and an easy-to-use interface. Squarespace is perfect for travel photographers, bloggers, and those who want visually stunning websites.
    • Weebly: A simple drag-and-drop website builder that’s ideal for beginners. Weebly also has e-commerce capabilities, which can be helpful if you plan to sell travel-related products.

    When choosing a website builder, consider factors such as ease of use, customization options, and pricing.

    4. Select a Template or Theme

    Most website builders come with pre-designed templates or themes that are easy to customize. When selecting a template for your travel website, consider the following:

    • Visual Appeal: Choose a theme that reflects the beauty of travel and showcases high-quality images. Your website should inspire visitors and make them excited about exploring new destinations.
    • Mobile-Friendly: Make sure the template is responsive, meaning it adjusts to different screen sizes. A mobile-friendly website is essential, as more travelers are using their smartphones to search for travel information.
    • Navigation: Choose a theme that offers clear, easy-to-use navigation. Visitors should be able to find information quickly and easily, whether they’re looking for travel guides, blog posts, or booking services.
    • Customizability: Look for a theme that allows you to easily change colors, fonts, and layouts. Your travel website should reflect your brand identity and stand out from others in the industry.

    Once you’ve selected a theme, you can start customizing it to match your brand’s style and personality.

    5. Add Essential Pages

    A well-organized travel website typically includes several essential pages that provide valuable information to visitors. Here are the key pages to include on your travel website:

    • Home Page: The first impression visitors will have of your website. Include a compelling headline, a brief introduction, and stunning visuals that capture the essence of travel. Make sure to include clear calls-to-action (CTAs), such as “Plan Your Trip” or “Start Exploring.”
    • About Page: Share the story behind your website, who you are, and what sets you apart from other travel websites. This is an opportunity to connect with your audience on a personal level.
    • Destinations: Highlight popular destinations and provide detailed information, such as things to do, places to stay, and local culture. You can categorize destinations by region, theme, or type of travel experience.
    • Blog: A blog is a great way to share travel tips, stories, and experiences. You can write about destinations, travel hacks, packing tips, and much more. Regularly posting fresh content will keep visitors engaged and help improve your site’s SEO.
    • Booking Page (Optional): If you offer travel services, such as tours or hotel bookings, you can include a booking page where users can make reservations. You can integrate third-party booking systems like Booking.com or use a WordPress plugin to manage bookings.
    • Contact Page: Include a contact form, your email address, phone number, and social media links. This allows visitors to get in touch with you easily, whether they have questions or want to collaborate.

    6. Optimize for SEO

    Search Engine Optimization (SEO) is the process of optimizing your website so that it ranks higher in search engine results. With millions of websites out there, it’s essential to ensure that your travel website is visible to your target audience. Here are some key SEO strategies for your travel website:

    • Keyword Research: Use tools like Google Keyword Planner or Ubersuggest to find keywords related to travel that your audience is searching for. For example, if you have a budget travel website, you might target keywords like “cheap travel destinations” or “budget travel tips.”
    • On-Page SEO: Optimize your website’s pages by including keywords in your page titles, headings, meta descriptions, and image alt texts. This helps search engines understand the content of your pages.
    • Content Optimization: Regularly update your blog with high-quality content that answers your audience’s questions and provides value. Include relevant keywords naturally in your blog posts.
    • Backlinks: Build backlinks by getting other reputable websites to link to your content. This helps improve your website’s authority and search engine rankings.
    • Site Speed: Ensure that your website loads quickly, as slow-loading websites can hurt your SEO and frustrate visitors. Use tools like Google PageSpeed Insights to test your website’s speed and make necessary improvements.

    7. Integrate Social Media

    Social media is an essential tool for promoting your travel website and connecting with your audience. Integrate your website with social media platforms such as Facebook, Instagram, Twitter, and Pinterest to share your content and engage with potential travelers. Here’s how you can leverage social media for your travel website:

    • Share Stunning Visuals: Travel is all about visuals, and platforms like Instagram and Pinterest are perfect for showcasing beautiful photos of destinations, accommodations, and experiences.
    • Engage with Followers: Respond to comments, answer questions, and engage with your followers. Building a community of loyal followers can help promote your website through word of mouth.
    • Social Sharing Buttons: Add social media sharing buttons to your blog posts, destination guides, and other pages so visitors can easily share your content with their networks.

    8. Launch and Promote Your Website

    Once your travel website is ready, it’s time to launch it and start promoting it to your target audience. Here are some strategies to get the word out:

    • Email Marketing: Build an email list by offering a freebie, such as a travel guide or discount, in exchange for visitors’ email addresses. Use email marketing to send updates, promotions, and travel tips to your subscribers.
    • Paid Advertising: Invest in paid advertising on Google or social media platforms to increase traffic to your website. Paid ads can help you target specific demographics and interests.
    • Collaborations: Partner with other travel bloggers, influencers, or brands to cross-promote your website and increase your reach.

    9. Monetize Your Travel Website

    If you’re looking to turn your travel website into a source of income, there are several ways to monetize it:

    • Affiliate Marketing: Promote travel products, services, and tours on your website and earn a commission for every sale made through your referral link.
    • Sponsored Content: Partner with travel brands to publish sponsored blog posts or ads on your website.
    • Selling Products or Services: If you offer your own travel tours or products, you can sell them directly on your website.
    • Ad Revenue: Use ad networks like Google AdSense to display ads on your website and earn revenue based on clicks or impressions.

    10. Maintain and Update Your Website

    After launching your travel website, it’s essential to maintain and update it regularly. This includes:

    • Adding New Content: Keep your blog fresh by publishing new posts about destinations, travel tips, and trends.
    • Checking for Broken Links: Regularly check your website for broken links and fix them to ensure a smooth user experience.
    • Updating Plugins and Software: If you’re using WordPress or other CMS, make sure to keep your plugins and software up to date to ensure your site’s security and performance.

    Conclusion

    Creating a travel website is an exciting and rewarding endeavor that allows you to share your love for travel while reaching a global audience. By following these steps—defining your niche, selecting the right tools, optimizing for SEO, and promoting your website—you can create a travel website that stands out in the crowded online travel space. Whether you aim to inspire travelers, offer booking services, or build a business around your passion, a well-designed and informative website can help you achieve your goals.

  • How to Create a Restaurant Website

    How to Create a Restaurant Website

    In today’s digital world, having a strong online presence is essential for businesses, especially for restaurants. A well-designed website can attract new customers, showcase your menu, and provide important information such as location, hours, and contact details. Whether you’re a seasoned restaurateur or just starting out, creating a restaurant website doesn’t have to be overwhelming. This guide will walk you through the steps to build an effective and engaging restaurant website that appeals to customers and drives business.

    1. Define Your Website’s Purpose

    Before diving into design and development, it’s crucial to understand the purpose of your website. Ask yourself questions like:

    • What do I want visitors to do on my website? (e.g., make reservations, browse the menu, order online)
    • Who is my target audience?
    • What information do I need to provide?

    Having clear goals will guide your design and content decisions.

    2. Choose a Platform

    There are several platforms available for creating websites, each with its own set of features and benefits. Some popular options include:

    • WordPress: Highly customizable with a wide range of themes and plugins.
    • Wix: User-friendly with drag-and-drop functionality.
    • Squarespace: Offers sleek and modern templates.
    • Shopify: Ideal for restaurants with a focus on online ordering.
    • Custom Development: For unique and highly tailored needs, consider hiring a developer.

    Choose a platform based on your budget, technical expertise, and the features you need.

    3. Secure a Domain Name and Hosting

    Your domain name is your website’s address on the internet (e.g., www.yourrestaurantname.com). Here are some tips for choosing a domain name:

    • Keep it short, simple, and memorable.
    • Use your restaurant’s name or a variation of it.
    • Avoid using numbers or special characters.
    • Check for availability using domain registrars like GoDaddy, Namecheap, or Google Domains.

    For hosting, consider providers like Bluehost, SiteGround, or HostGator. Many website builders also include hosting as part of their package.

    4. Select a Template or Theme

    Most website builders offer templates specifically designed for restaurants. Look for a template that:

    • Matches your brand’s aesthetic.
    • Includes features like menu displays, reservation forms, and photo galleries.
    • Is mobile-friendly, as many customers will view your site on their phones.

    If you’re using WordPress, you can explore themes like Divi, Astra, or specific restaurant-focused themes.

    5. Design the Website

    The design of your website should reflect your restaurant’s brand and ambiance. Consider the following:

    • Color Scheme: Use colors that align with your branding and evoke the right mood.
    • Typography: Choose fonts that are easy to read and match your style.
    • Images: Invest in high-quality photos of your dishes, interior, and events.
    • Navigation: Ensure the menu is intuitive and easy to use.

    6. Add Essential Pages

    A restaurant website should include several key pages:

    a) Homepage

    The homepage is the first impression of your restaurant. Include:

    • A captivating hero image or video.
    • A brief introduction to your restaurant.
    • Call-to-action buttons (e.g., “View Menu,” “Make a Reservation”).

    b) Menu Page

    The menu page is one of the most visited sections of a restaurant website. Ensure that your menu:

    • Is easy to read.
    • Includes descriptions of dishes.
    • Features prices and dietary information (e.g., vegan, gluten-free).

    You can use PDF uploads, but a web-friendly format is preferable for SEO and accessibility.

    c) About Us Page

    Share your restaurant’s story, mission, and values. Include:

    • The history of your restaurant.
    • Information about the chef or team.
    • Photos or videos of your team.

    d) Contact Page

    Make it easy for customers to reach you. Include:

    • Your address with an embedded Google Map.
    • Phone number and email.
    • Operating hours.
    • A contact form for inquiries.

    e) Reservations and Online Ordering

    If you accept reservations or online orders, create dedicated sections for these features. Integrate tools like OpenTable, Resy, or Toast for a seamless experience.

    f) Gallery

    Showcase the best aspects of your restaurant with a gallery page. Include:

    • Photos of your dishes.
    • Images of your interior and exterior.
    • Event photos (if applicable).

    7. Optimize for Mobile

    More than half of web traffic comes from mobile devices. Your website should:

    • Be responsive and adapt to different screen sizes.
    • Have fast loading times.
    • Feature touch-friendly navigation.

    Test your site on various devices to ensure a seamless experience.

    8. Incorporate SEO

    Search Engine Optimization (SEO) helps your website rank higher on search engines. Key practices include:

    • Keyword Research: Use tools like Google Keyword Planner to find relevant terms (e.g., “Italian restaurant in New York”).
    • Meta Descriptions: Write concise and compelling descriptions for each page.
    • Alt Text: Add descriptive text to images.
    • Local SEO: Register your restaurant on Google My Business and other local directories.

    9. Integrate Social Media

    Link your website to your social media accounts. Add buttons or widgets for platforms like Instagram, Facebook, and Twitter. This helps customers connect with you on multiple channels.

    10. Implement Online Ordering and Delivery

    If your restaurant offers takeout or delivery, integrate online ordering features. Options include:

    • Third-party services like Uber Eats, DoorDash, or Grubhub.
    • In-house solutions for commission-free orders.

    Ensure the ordering process is user-friendly and includes payment options.

    11. Enable Reviews and Testimonials

    Display customer reviews and testimonials to build trust. You can:

    • Embed reviews from platforms like Yelp or Google.
    • Create a testimonials section with curated quotes.

    12. Add Analytics Tools

    Use tools like Google Analytics to track your website’s performance. Monitor metrics such as:

    • Number of visitors.
    • Bounce rate.
    • Popular pages.
    • Conversion rates (e.g., reservations, orders).

    13. Test Your Website

    Before launching, thoroughly test your website to ensure it functions as expected. Check for:

    • Broken links.
    • Spelling and grammar errors.
    • Compatibility with different browsers (Chrome, Safari, Firefox).

    14. Launch and Promote

    Once your website is ready, promote it through:

    • Social media posts.
    • Email newsletters.
    • Flyers or business cards with the website URL.
    • Local advertising.

    15. Maintain and Update

    Keep your website fresh by regularly updating it with:

    • Seasonal menus.
    • Upcoming events.
    • New photos.
    • Blog posts about food trends or recipes.

    Creating a restaurant website may seem daunting at first, but by following these steps, you can build an engaging and effective online presence. A well-crafted website not only attracts new customers but also keeps your loyal patrons informed and engaged. Start building your website today and watch your restaurant thrive in the digital age.

  • How to Create a Photography Website

    How to Create a Photography Website

    A photography website is essential for showcasing your portfolio, connecting with clients, and building your brand. Whether you’re an amateur photographer looking to share your passion or a professional aiming to attract new clients, a well-designed website can set you apart. Here is a comprehensive guide to help you create an effective photography website.

    Step 1: Define Your Goals

    Before starting, clarify the purpose of your website. Ask yourself:

    • Are you showcasing your portfolio?
    • Do you want to sell prints or photography services?
    • Are you trying to attract clients or build a community?

    Clearly defined goals will help you make informed decisions about design, content, and functionality.

    Step 2: Choose a Domain Name

    Your domain name should be:

    • Memorable: Easy to spell and remember.
    • Relevant: Reflect your brand or photography niche.
    • Professional: Avoid numbers, hyphens, or slang.

    For example, if your name is Jane Doe, consider domains like JaneDoePhotography.com or DoePhotography.com. Use domain registration platforms like GoDaddy, Namecheap, or Google Domains to secure your desired name.

    Step 3: Select a Web Hosting Provider

    Web hosting is essential for making your website accessible online. Choose a reliable hosting provider with features like:

    • Fast loading speeds.
    • Ample storage for high-resolution images.
    • Secure hosting with SSL certificates.

    Popular hosting providers include Bluehost, SiteGround, and HostGator.

    Step 4: Choose a Website Builder or Platform

    Photography websites need visually appealing layouts and easy customization. Consider these popular platforms:

    1. WordPress

    • Pros: Highly customizable, extensive plugin library, and scalable.
    • Cons: Requires a learning curve.
    • Best for: Professionals needing advanced features.

    2. Squarespace

    • Pros: Beautiful templates tailored for photographers, all-in-one solution.
    • Cons: Limited customization compared to WordPress.
    • Best for: Beginners seeking simplicity.

    3. Wix

    • Pros: Drag-and-drop interface, user-friendly.
    • Cons: Less scalable for large portfolios.
    • Best for: Small portfolios and easy setup.

    4. SmugMug

    • Pros: Built specifically for photographers, integrated e-commerce.
    • Cons: Limited design flexibility.
    • Best for: Selling prints and displaying portfolios.

    Step 5: Select a Template or Theme

    Your website’s design should highlight your photography. Look for templates with:

    • Full-screen image displays.
    • Clean and minimalistic layouts.
    • Responsive design for mobile and tablet users.

    Popular marketplaces for WordPress themes include ThemeForest, StudioPress, and Elegant Themes.

    Step 6: Organize Your Portfolio

    Create categories or galleries based on your specialties, such as:

    • Portraits
    • Weddings
    • Landscapes
    • Commercial photography

    Limit each gallery to your best work—quality over quantity is key.

    Step 7: Add Essential Pages

    A well-rounded photography website includes the following pages:

    1. Home Page

    • Feature a captivating hero image or slider.
    • Include a clear call-to-action (e.g., “View Portfolio” or “Book a Session”).

    2. Portfolio Page

    • Showcase high-quality images.
    • Organize galleries by theme or project.

    3. About Page

    • Share your story, style, and experience.
    • Include a professional photo of yourself.

    4. Services Page

    • List the services you offer, such as event photography, portraits, or photo editing.
    • Include pricing or invite visitors to request a quote.

    5. Contact Page

    • Provide a contact form for inquiries.
    • Include your email, phone number, and social media links.

    6. Blog (Optional)

    • Write articles on photography tips, behind-the-scenes stories, or recent projects to engage visitors and improve SEO.

    Step 8: Optimize for SEO

    Search engine optimization (SEO) helps your website rank higher in search results. Follow these SEO tips:

    • Use relevant keywords in titles, descriptions, and alt tags.
    • Optimize image sizes for fast loading without sacrificing quality.
    • Write meta descriptions for each page.
    • Create a sitemap and submit it to search engines like Google.

    Step 9: Enable E-Commerce (Optional)

    If you plan to sell prints or photography services, add e-commerce functionality:

    • Use platforms like WooCommerce (WordPress), Squarespace Commerce, or SmugMug’s integrated store.
    • Set up secure payment methods like PayPal or Stripe.
    • Include detailed product descriptions and pricing.

    Step 10: Ensure Mobile Responsiveness

    A significant portion of web traffic comes from mobile devices. Test your site on various screen sizes to ensure:

    • Images load quickly.
    • Navigation is intuitive.
    • Text is legible.

    Step 11: Incorporate Social Media Integration

    Link your social media profiles to your website. Use social media plugins or widgets to:

    • Display your Instagram feed.
    • Add share buttons for your portfolio or blog posts.

    Step 12: Test Your Website

    Before launching, thoroughly test your website:

    • Check for broken links.
    • Ensure pages load quickly.
    • Test contact forms and e-commerce features.
    • Review spelling and grammar.

    Step 13: Launch and Promote

    Once your website is ready:

    • Announce the launch on your social media platforms.
    • Share the link with friends, family, and clients.
    • Use email marketing to reach potential clients.

    Step 14: Maintain and Update Your Website

    Keep your website fresh and relevant:

    • Regularly update your portfolio with new work.
    • Post blog articles to keep visitors engaged.
    • Monitor website analytics to understand visitor behavior and improve performance.

    Creating a photography website requires careful planning and execution. By following these steps, you can build a professional platform that showcases your talent, attracts clients, and helps you achieve your goals. Start today, and let your website become a powerful tool in your photography journey.

  • How to Create a Business Website in 2025

    How to Create a Business Website in 2025

    Creating a business website in 2025 is essential for establishing an online presence, reaching a global audience, and building credibility. Whether you’re starting a new venture or looking to upgrade an existing website, this comprehensive guide will walk you through the steps to create a professional, functional, and visually appealing business website.


    1. Define Your Goals and Audience

    Before building a website, identify the purpose and target audience of your site. Ask yourself the following questions:

    • What is the primary objective of the website? (e.g., e-commerce, lead generation, brand awareness, etc.)
    • Who is your target audience? (e.g., demographics, preferences, and online behavior)
    • What specific features and functionalities will your website require? (e.g., contact forms, live chat, payment gateways, etc.)

    Clearly defining your goals and audience will guide your design and content decisions.


    2. Choose a Domain Name

    Your domain name is your online address. It should be:

    • Memorable: Easy to spell and remember.
    • Relevant: Reflect your business or brand name.
    • Short and Simple: Avoid long or complex names.
    • Professional: Use a recognized domain extension like .com, .net, or country-specific extensions (e.g., .uk, .ca).

    Use domain registration platforms like GoDaddy, Namecheap, or Google Domains to check the availability of your desired name and purchase it.


    3. Select a Reliable Hosting Provider

    A web hosting provider stores your website’s data and makes it accessible on the internet. When selecting a hosting provider, consider:

    • Speed: Look for hosting plans that offer fast loading times.
    • Uptime: Aim for providers with at least 99.9% uptime.
    • Support: Ensure 24/7 customer support.
    • Scalability: Choose plans that can grow with your business.
    • Security: Look for SSL certificates and advanced security measures.

    Popular hosting providers include Bluehost, SiteGround, and HostGator. Many hosting providers offer all-in-one packages that include domain registration, hosting, and email services.


    4. Choose a Website-Building Platform

    Website-building platforms, also known as content management systems (CMS), allow you to create and manage your website with ease. Popular options include:

    • WordPress: Highly customizable and ideal for all types of websites.
    • Wix: User-friendly drag-and-drop interface for beginners.
    • Squarespace: Great for design-focused businesses.
    • Shopify: Best for e-commerce websites.

    Each platform has its pros and cons, so choose the one that best aligns with your technical skills, budget, and website requirements.


    5. Plan Your Website Structure

    A clear and intuitive website structure enhances user experience (UX). Common pages to include are:

    • Home Page: A brief overview of your business, with a compelling call-to-action (CTA).
    • About Us: Information about your company’s mission, history, and team.
    • Products/Services: Detailed descriptions of your offerings.
    • Blog: Informative articles and updates (optional but beneficial for SEO).
    • Contact Page: Contact forms, email addresses, phone numbers, and physical address.

    Consider creating a sitemap to organize the hierarchy and navigation of your pages.


    6. Design Your Website

    The design of your website sets the tone for your brand. Key design principles include:

    • Consistency: Use a cohesive color palette and typography.
    • Mobile Responsiveness: Ensure your website looks great on all devices.
    • User-Friendly Navigation: Keep menus simple and intuitive.
    • High-Quality Visuals: Use professional images and videos.

    Most CMS platforms offer customizable templates and themes, making it easier to achieve a professional look without needing advanced design skills.


    7. Optimize for Search Engines (SEO)

    Search engine optimization (SEO) helps your website rank higher on search engines, increasing visibility and traffic. Focus on:

    • Keyword Research: Identify and target relevant keywords.
    • Meta Tags: Write compelling meta titles and descriptions.
    • Alt Text: Add descriptive text to images.
    • Fast Loading Speeds: Optimize images and reduce unnecessary code.
    • Backlinks: Build relationships with other websites for link building.

    Using tools like Google Analytics and SEMrush can help monitor your SEO performance.


    8. Add Essential Features

    Incorporate features that improve user experience and align with your business goals. Examples include:

    • Live Chat: Real-time customer support.
    • E-commerce Functionality: Shopping cart, payment gateway, and product reviews.
    • Newsletter Signup: Build an email list for marketing.
    • Social Media Integration: Connect your website to your social channels.
    • Security Features: SSL certificate, regular backups, and firewalls.

    9. Test Your Website

    Before launching, thoroughly test your website for:

    • Functionality: Check all links, forms, and buttons.
    • Compatibility: Ensure it works on various browsers and devices.
    • Speed: Optimize for fast loading times.
    • Content Accuracy: Proofread for typos and grammatical errors.

    Tools like Google PageSpeed Insights and BrowserStack can help in testing.


    10. Launch and Promote Your Website

    Once you’re confident your website is ready, it’s time to go live. Promote your site using:

    • Social Media: Share your website on platforms like Facebook, Instagram, and LinkedIn.
    • Email Marketing: Announce the launch to your subscribers.
    • Search Engine Marketing (SEM): Run pay-per-click (PPC) ads on Google.
    • Networking: Share your site at events and with your professional network.

    11. Monitor and Update Regularly

    A successful website requires ongoing maintenance. Regularly:

    • Update Content: Keep your information fresh and relevant.
    • Monitor Performance: Use tools like Google Analytics to track traffic and engagement.
    • Improve Security: Update plugins, themes, and security measures.
    • Expand Features: Add new functionalities as your business grows.

    Creating a business website in 2025 is a straightforward process with the right tools and planning. By following the steps outlined in this guide, you can build a website that not only meets your business needs but also provides a great user experience. Start today, and take your business to the next level with a professional online presence.

  • Shared Hosting vs VPS Hosting: Which One Should You Choose?

    Shared Hosting vs VPS Hosting: Which One Should You Choose?

    When you’re setting up a website, one of the first decisions you’ll face is choosing the right hosting plan. Among the most common options are Shared Hosting and VPS Hosting. Both have their own strengths and weaknesses, making the choice dependent on your specific needs. In this article, we’ll explore these two hosting types in-depth to help you determine which one is the best fit for your website.


    What Is Shared Hosting?

    Shared Hosting is a type of web hosting where multiple websites share the resources of a single server. These resources include CPU, RAM, disk space, and bandwidth. It’s akin to renting an apartment with roommates – you’re all using the same space and facilities, and the cost is divided among the tenants.

    Advantages of Shared Hosting:
    1. Affordability: Shared Hosting plans are generally the most cost-effective, making them ideal for beginners or small businesses.
    2. Ease of Use: Most Shared Hosting providers offer user-friendly control panels like cPanel, making it easy to manage your website without technical expertise.
    3. Maintenance-Free: The hosting provider takes care of server maintenance, updates, and security, freeing you from these responsibilities.
    Disadvantages of Shared Hosting:
    1. Limited Resources: Since resources are shared, your website may experience slowdowns if other sites on the server consume a lot of bandwidth or processing power.
    2. Security Risks: If one website on the server is compromised, it could potentially affect other websites.
    3. Lack of Customization: Shared Hosting environments often limit the software and configurations you can use.

    What Is VPS Hosting?

    VPS (Virtual Private Server) Hosting provides a middle ground between Shared Hosting and a dedicated server. In this setup, a physical server is divided into multiple virtual servers using virtualization technology. Each virtual server operates independently, giving you more control and dedicated resources.

    Advantages of VPS Hosting:
    1. Dedicated Resources: You have allocated CPU, RAM, and disk space that are not shared with other users.
    2. Scalability: VPS Hosting allows you to easily upgrade your resources as your website grows.
    3. Customization: You have root access to your virtual server, enabling you to install custom software and configure settings to your liking.
    4. Enhanced Security: Since your environment is isolated, the security risks posed by other users are significantly reduced.
    Disadvantages of VPS Hosting:
    1. Higher Cost: VPS Hosting is more expensive than Shared Hosting, though it’s still more affordable than a dedicated server.
    2. Technical Knowledge Required: Managing a VPS often requires a basic understanding of server management, particularly if it’s an unmanaged plan.
    3. Responsibility for Maintenance: Unless you choose a managed VPS plan, you’re responsible for updates, backups, and security.

    Key Differences Between Shared Hosting and VPS Hosting

    To make an informed decision, it’s crucial to understand how these hosting options differ:

    1. Resource Allocation:
      • Shared Hosting: Resources are pooled and shared among multiple users, which can lead to performance issues during high traffic periods.
      • VPS Hosting: Resources are dedicated to your virtual server, ensuring consistent performance.
    2. Performance:
      • Shared Hosting: Performance can be unpredictable due to resource sharing.
      • VPS Hosting: Generally offers better performance and stability, as your resources are isolated.
    3. Security:
      • Shared Hosting: Vulnerable to cross-site contamination if another site on the server is compromised.
      • VPS Hosting: More secure, as your environment is isolated from others.
    4. Cost:
      • Shared Hosting: Cheaper and often includes basic features like email hosting and one-click installers.
      • VPS Hosting: Higher cost but comes with enhanced features and flexibility.
    5. Control and Customization:
      • Shared Hosting: Limited control over server settings.
      • VPS Hosting: Full root access allows for extensive customization.

    When to Choose Shared Hosting

    Shared Hosting is ideal for:

    1. Small Websites: If your website is a personal blog, portfolio, or small business site with low to moderate traffic.
    2. Budget Constraints: When you’re just starting out and need a cost-effective solution.
    3. No Technical Expertise: If you want a hands-off approach and don’t have the skills or resources to manage a server.

    When to Choose VPS Hosting

    VPS Hosting is suitable for:

    1. Growing Websites: If your website is experiencing increased traffic or requires more resources.
    2. E-commerce Sites: Online stores that need enhanced security and consistent performance.
    3. Custom Applications: If you’re running applications that require specific configurations.
    4. Developers: Those who need full control over their hosting environment.

    Managed vs. Unmanaged VPS Hosting

    If you decide on VPS Hosting, you’ll also need to choose between managed and unmanaged plans:

    1. Managed VPS Hosting:
      • The hosting provider handles server maintenance, updates, and security.
      • Best for users who prefer a hands-off approach.
      • More expensive than unmanaged plans.
    2. Unmanaged VPS Hosting:
      • You’re responsible for all server management tasks.
      • Offers more flexibility and control.
      • Requires technical expertise.

    Case Study: Choosing the Right Hosting Plan

    Let’s consider two hypothetical scenarios:

    1. Sarah’s Blog:
      • Sarah is starting a personal blog to share her travel experiences. She expects low traffic initially and has a limited budget. For Sarah, Shared Hosting is the ideal choice. It’s affordable, easy to use, and sufficient for her needs.
    2. Tom’s Online Store:
      • Tom runs an e-commerce store with a growing customer base. He needs consistent performance, enhanced security, and the ability to customize his hosting environment. Tom opts for VPS Hosting to ensure his site can handle increased traffic and provide a secure shopping experience.

    Pros and Cons at a Glance

    FeatureShared HostingVPS Hosting
    CostLowMedium to High
    Ease of UseBeginner-friendlyRequires some technical knowledge
    PerformanceMay varyConsistent and reliable
    SecurityShared vulnerabilitiesEnhanced isolation and security
    CustomizationLimitedHigh
    ScalabilityLimitedEasily scalable

    Choosing between Shared Hosting and VPS Hosting ultimately depends on your website’s needs, your technical expertise, and your budget. If you’re just starting out with a small website and minimal traffic, Shared Hosting is a cost-effective and user-friendly choice. However, if your website is growing, requires higher performance, or needs specific configurations, VPS Hosting is the better option.

    Take the time to assess your current requirements and future growth potential. With the right hosting plan, you can ensure your website’s success and provide an optimal experience for your visitors.

  • What is VPS Hosting?

    What is VPS Hosting?

    A Virtual Private Server (VPS) is a hosting solution that offers a more advanced version of shared hosting. In VPS hosting, your website or application is allocated dedicated resources such as its own operating system, storage, and RAM within a single physical server. While sharing the physical server with others, your resources are isolated, giving you a level of functionality similar to that of a dedicated server. This makes VPS hosting ideal for websites or applications that require better performance, reliability, and control.

    VPS hosting acts as a standalone server, offering dedicated resources at a fraction of the cost of dedicated hosting. It’s a popular choice for growing websites, high-traffic blogs, eCommerce stores, and businesses needing enhanced control and performance.


    What is Cloud Hosting?

    Cloud hosting is a flexible hosting solution where your website or application’s data is distributed across multiple servers within a vast network. Unlike traditional hosting that relies on a single physical machine, cloud hosting leverages the power of interconnected servers. This ensures greater scalability, redundancy, and reliability. Your data is accessible online, which allows for seamless resource allocation based on your needs.

    Cloud hosting can be visualized as a large water tank of resources. You use only what you need, and as your website’s requirements grow or shrink, you can adjust resource allocation accordingly. This flexibility makes cloud hosting ideal for dynamic, high-traffic websites.


    Key Differences: VPS Hosting vs Cloud Hosting

    1. Resource Allocation
      • VPS Hosting: Resources such as CPU, RAM, and storage are dedicated to your website within a single physical server. Scaling often requires migrating to a higher plan if resources are fixed.
      • Cloud Hosting: Resources are allocated across multiple servers, allowing for flexible and dynamic scaling without migration.
    2. Scalability
      • VPS Hosting: Scalability is typically vertical, meaning you can add more CPU, RAM, or storage within the physical server’s limits. Some providers may have fixed plans requiring upgrades.
      • Cloud Hosting: Offers seamless scalability, enabling you to adjust resources on demand to handle traffic spikes or changing needs.
    3. Control and Flexibility
      • VPS Hosting: Provides greater control over server configuration, software installation, and optimization, but requires technical expertise.
      • Cloud Hosting: Offers user-friendly interfaces for resource management but may have limited control compared to VPS.
    4. Cost
      • VPS Hosting: Typically has a fixed monthly cost based on allocated resources.
      • Cloud Hosting: Uses a pay-as-you-go model, charging for the resources you consume.
    5. Security
      • VPS Hosting: Offers a dedicated environment, enhancing security. However, security largely depends on user management and the hosting provider’s measures.
      • Cloud Hosting: Provides strong built-in security measures, though data breaches may affect multiple users in rare cases.
    6. Performance
      • VPS Hosting: Delivers consistent performance due to dedicated resources but may face downtime due to hardware failures.
      • Cloud Hosting: Known for high performance through redundancy and load balancing across multiple servers.
    7. Uptime
      • VPS Hosting: Relies on the physical server’s hardware, which can lead to occasional downtime.
      • Cloud Hosting: Offers higher uptime due to redundancy and automatic failover across servers.

    Benefits of VPS Hosting

    1. Dedicated Resources: Guarantees a portion of server resources, ensuring consistent performance and uptime.
    2. Increased Control: Provides administrative privileges for server configuration and optimization.
    3. Cost-Effective: More affordable than dedicated hosting, offering better performance than shared hosting.
    4. Scalability: Allows resource upgrades for growing websites, although often within fixed plans.
    5. Predictable Performance: Ideal for websites with steady traffic patterns, ensuring reliable performance.

    Drawbacks of VPS Hosting

    1. Technical Expertise Required: Managing a VPS requires knowledge of server management, such as using control panels and troubleshooting.
    2. Single Point of Failure: Dependency on a single physical server makes it vulnerable to hardware failures.
    3. Less Beginner-Friendly: Beginners may find VPS hosting challenging compared to shared hosting.

    Benefits of Cloud Hosting

    1. Scalability: Easily adjust resources during traffic spikes or changing needs.
    2. High Availability: Reduced downtime due to redundancy across multiple servers.
    3. Cost-Efficiency: Pay-as-you-go model charges only for the resources used.
    4. Advanced Features: Includes tools like load balancing, auto-scaling, and CDNs.
    5. Global Reach: Distributed data centers ensure low latency for users worldwide.

    Drawbacks of Cloud Hosting

    1. Potential for Higher Costs: Costs can escalate with consistent high resource usage.
    2. Security Concerns: Data breaches may affect multiple users.
    3. Internet Dependency: Relies on a stable internet connection for optimal performance.

    VPS Hosting vs Cloud Hosting: Which is Right for You?

    • Choose VPS Hosting if:
      • Your website has steady, predictable traffic.
      • You need more control over server management.
      • You’re running a business, high-traffic blog, eCommerce site, or development environment.
    • Choose Cloud Hosting if:
      • Your website experiences unpredictable traffic spikes.
      • Scalability and global reach are essential.
      • You prioritize reliability and redundancy.

    Affordable VPS Hosting Solutions

    Looking for cost-effective VPS hosting? HostBet offers affordable plans designed for growing businesses and bloggers. Enjoy seamless scalability, robust security, and exceptional performance at budget-friendly prices. Experience the power of dedicated resources without overspending.


    Final Thoughts on VPS Hosting vs Cloud Hosting

    Choosing between VPS and cloud hosting depends on your website’s specific requirements. VPS hosting provides a virtual machine with dedicated resources, ideal for predictable traffic patterns and users comfortable with server management. Cloud hosting, on the other hand, excels in flexibility and scalability, making it suitable for dynamic traffic and rapid growth. Evaluate your needs carefully to select the best hosting solution for your website or application.

  • Cheap VPS Hosting: A Comprehensive Guide

    Cheap VPS Hosting: A Comprehensive Guide

    Are you tired of your current web hosting? Is your shared or any other web hosting plan holding back your website or blog from growing? It might be time for a powerful upgrade. Dedicated hosting can be prohibitively expensive, but there is an affordable solution: cheap VPS hosting (Virtual Private Server).

    While slightly more expensive than shared hosting, VPS hosting offers significantly more flexibility, performance, and control—all at a fraction of the cost of dedicated hosting. This comprehensive guide will show you how to choose the ideal reliable and cheap VPS hosting provider, ensuring your website’s growth without sacrificing affordability.

    What is VPS Hosting, and How Does VPS Work?

    A Virtual Private Server (VPS) is like having your own private apartment within a larger building. While you share the physical server with others, your VPS operates in an isolated virtual environment. Each VPS has its own dedicated resources such as CPU, RAM, and storage—similar to how an apartment has its own space and utilities.

    VPS servers are created using a special program called a hypervisor, which partitions the physical server into multiple virtual servers. This ensures that each VPS operates independently and securely. You can customize your VPS by installing software and optimizing it to enhance your website’s performance and security.

    Understanding Your Website Needs

    Before choosing a VPS hosting plan, it’s crucial to understand your website’s specific requirements:

    • Website Traffic: Analyze your website analytics to determine how many visitors you receive daily or monthly. Anticipate future growth.
    • Resource Requirements: Determine how much CPU, RAM, storage, and bandwidth you’ll need based on your current and future traffic.
    • OS or Software Needs: Identify any specific operating systems or software your website requires, and ensure your hosting provider supports them.
    • Technical Comfort Level: Managing a VPS requires basic technical skills such as accessing a control panel and troubleshooting issues.
    • Cost: VPS hosting is more expensive than shared hosting but significantly cheaper than dedicated hosting. Choose a plan that balances affordability and features.
    • Scalability Requirements: Opt for a hosting provider that offers flexible plans to scale resources as your website grows.

    VPS Hosting Essential Features You Need to Consider

    When choosing a VPS hosting provider, consider the following essential features:

    1. Resource Allocation: Ensure the plan offers sufficient CPU, RAM, and storage for your needs.
    2. CPU Cores: The more cores, the better your server can handle complex tasks.
    3. RAM (Memory): Higher RAM allows your server to handle more traffic and run applications efficiently.
    4. Storage (Disk Space): Look for NVMe SSD storage for faster performance.
    5. Operating System Options: Ensure the provider supports your preferred OS (e.g., Linux, Windows, Ubuntu).
    6. Backups: Backups are crucial for disaster recovery. Confirm that the plan includes regular backups.
    7. Security Features: Look for firewalls, malware protection, and other security measures.
    8. Scalability: Choose a provider that allows easy upgrading or downgrading of resources.
    9. Customer Support: Ensure 24/7 customer support is available via your preferred channels (phone, chat, email).

    How Many Daily Visitors Can VPS Handle?

    The number of visitors a VPS can handle depends on:

    1. VPS Plan Resources: Higher resource allocations (CPU, RAM, storage) can accommodate more visitors.
    2. Website Optimization: A well-optimized website can handle more traffic than a poorly optimized one.

    Here’s a general guide:

    • Low-End VPS: Handles a few hundred to a thousand daily visitors.
    • Mid-Range VPS: Handles thousands to tens of thousands of daily visitors.
    • High-End VPS: Handles hundreds of thousands to millions of daily visitors with proper optimization.

    Which Cheap VPS Hosting Is Right for You?

    Selecting the right VPS hosting provider involves evaluating several factors:

    1. Resource Allocation: Ensure the plan meets your resource needs.
    2. Pricing: Compare pricing structures and features among providers.
    3. Features: Look for additional features like managed services or pre-installed software.
    4. Server Location: Choose a provider with servers close to your target audience.
    5. Reputation and Reviews: Check online reviews and the provider’s reputation.

    Unleash Power & Affordability: Explore High-Performance VPS Hosting

    Empower your website with our new VPS hosting solutions. Choose from five plans—Micro, Andromeda, Cygnus, Leo, and Photon—designed to balance power, control, reliability, and affordability. Our plans include:

    • Seamless scalability
    • Top-tier security
    • 24/7/365 expert support

    With our cloud VPS hosting, you’ll achieve faster performance, enhanced security, and unmatched affordability.

    Pros and Cons of VPS Hosting

    Pros:

    • Faster & More Secure: Dedicated resources ensure superior performance and security.
    • Greater Control: Customize server configurations for optimized performance.
    • Scalability: Easily upgrade or downgrade resources.
    • Cost-Effective: More powerful than shared hosting at a fraction of dedicated server costs.

    Cons:

    • Technical Knowledge Needed: Managing a VPS requires basic technical skills.
    • Higher Cost: Slightly more expensive than shared hosting.
    • Limited Resources: Cheap plans may have lower resource allocations.
    • Management Responsibility: You’re responsible for server maintenance and updates.

    Final Thoughts: Cheap VPS Hosting

    VPS hosting is an excellent choice for those seeking more power and flexibility without breaking the bank. By carefully evaluating your website’s needs and comparing hosting providers, you can find a plan that ensures your website’s growth and success.

    Frequently Asked Questions

    How Do I Choose a VPS Hosting Provider? Evaluate resource allocation, pricing, features, server locations, and customer reviews.

    Is VPS Hosting Good? Yes, VPS hosting offers enhanced performance, security, and scalability compared to shared hosting.

    What’s the Difference Between VPS and Shared Hosting? VPS hosting provides dedicated resources and greater control, while shared hosting shares resources among multiple users.

    Which Company Is Best for VPS? The best VPS hosting provider depends on your specific needs and budget. Research reputable providers and compare their offerings.

    What Is the Cost of 2GB VPS? Costs vary by provider but generally range from $5 to $20 per month for a 2GB VPS plan.

  • Linux VPS Hosting: Affordable, Reliable, and Powerful

    Linux VPS Hosting: Affordable, Reliable, and Powerful

    When it comes to web hosting, Linux VPS (Virtual Private Server) hosting stands out as a popular choice for businesses and individuals seeking a blend of affordability, performance, and flexibility. VPS hosting allocates dedicated portions of a single physical server, providing resources such as CPU, RAM, and storage. Compared to shared hosting, it offers more control, and with Linux being open-source, it’s an economical option compared to Windows VPS hosting, which includes licensing fees. Let’s delve into why Linux VPS hosting is an excellent choice, particularly for those on a budget.


    What is Linux VPS Hosting?

    Linux VPS hosting is a type of web hosting that runs on the Linux operating system. Unlike shared hosting, where multiple websites share the same server resources, VPS hosting provides dedicated portions of a server for each user. This results in improved performance, enhanced security, and greater control over server configurations. Due to Linux’s open-source nature, Linux VPS hosting is often more cost-effective than its Windows counterpart, making it an ideal choice for various online projects.


    Benefits of Cheap Linux VPS Hosting

    1. Affordability without Compromise Cheap Linux VPS hosting doesn’t mean compromised quality. Instead, it offers affordable solutions with dedicated resources such as CPU, RAM, and storage. You also have the flexibility to choose your preferred Linux distribution, making it a cost-effective option without sacrificing performance or reliability.

    2. Scalability to Match Your Growth As your website or blog grows, Linux VPS hosting allows you to easily scale server resources like RAM and storage. This flexibility ensures your hosting solution evolves with your needs, providing uninterrupted service as your traffic increases.

    3. Enhanced Security and Control The open-source nature of Linux means vulnerabilities are swiftly addressed by its large community of developers. This makes Linux VPS hosting a secure option. Additionally, users enjoy greater control over their server environments, including the ability to customize configurations to suit specific requirements.

    4. Versatility for Diverse Applications Whether you’re running a personal blog, an e-commerce store, or complex applications, Linux VPS hosting caters to all types of projects. Its robust performance and flexibility make it suitable for businesses of any size.

    5. Community Support and Resources Linux VPS hosting benefits from a vast, active community offering 24/7/365 support, comprehensive tutorials, and forums. This ensures you have the resources to manage your hosting environment effectively.


    Top Features to Look For in Cheap Linux VPS Hosting

    When selecting a Linux VPS hosting plan, consider the following essential features to ensure optimal performance and reliability:

    1. CPU and RAM Allocation Ensure the hosting provider offers sufficient processing power and memory to meet your website’s needs. These resources directly impact the performance and responsiveness of your site.

    2. Storage Options Opt for modern NVMe SSD storage for faster performance and improved reliability compared to traditional HDDs. Ample storage space ensures your site can handle data-intensive operations efficiently.

    3. Bandwidth Limits Choose a plan with generous bandwidth to accommodate your website’s traffic. Limited bandwidth can lead to slow loading times or service disruptions during high-traffic periods.

    4. Operating System Flexibility Select a Linux distribution that aligns with your technical preferences and project requirements. Popular options include Ubuntu, Debian, CentOS, AlmaLinux, and Fedora.

    5. Customer Support Reliable and responsive customer support is crucial. Look for providers that offer 24/7/365 support through multiple channels such as live chat, tickets, and WhatsApp.

    6. Backups Ensure the VPS plan includes regular backups. This feature is vital for disaster recovery and ensures your data is secure in case of server issues.


    HostBet’s Affordable Linux VPS Hosting Plans

    HostBet introduces a range of affordable Linux VPS hosting solutions designed to empower your online presence. These plans offer increasing resource allocations, seamless scalability, and top-tier security:

    1. Micro Plan:
      • 2 vCPUs
      • 4GB DDR4 ECC RAM
      • 40GB NVMe SSD Storage
      • 5TB Bandwidth
      • 1 IPv4 Address
      • Price: Rs. 400 ($4.77) per month
    2. Andromeda Plan:
      • Higher resource allocation suitable for growing businesses
    3. Cygnus Plan:
      • Advanced capabilities for medium-sized projects
    4. Leo Plan:
      • Perfect for high-traffic websites or applications
    5. Photon Plan:
      • Enterprise-level resources for large-scale operations

    With seamless scalability, HostBet ensures you can upgrade your plan without any data loss as your needs evolve. Each plan comes with robust security measures and 24/7/365 expert support.


    Advantages of Choosing HostBet

    HostBet’s Linux VPS hosting offers the perfect balance of power, affordability, and reliability. Key benefits include:

    • Comprehensive Operating System Support: Choose from Ubuntu, Debian, CentOS, AlmaLinux, and Fedora.
    • Robust Security: Enjoy peace of mind with top-tier security features and regular updates.
    • Expert Support: Dedicated customer support is available around the clock to address any issues.
    • Flexible Pricing: Affordable plans tailored to suit various project needs and budgets.

    Frequently Asked Questions

    1. What is cheap Linux VPS hosting? Cheap Linux VPS hosting provides dedicated portions of a server running on Linux at affordable prices. It includes resources like CPU, RAM, and storage, offering more control than shared hosting.

    2. How much does cheap Linux VPS hosting cost? Prices vary depending on the plan and provider. For example, HostBet’s Micro Plan offers 2 vCPUs, 4GB RAM, and 40GB storage for just Rs. 400 ($4.77) per month.

    3. What are the benefits of Linux VPS hosting over shared hosting? Linux VPS hosting provides dedicated server resources, faster loading speeds, and greater control compared to shared hosting.

    4. Is Linux VPS hosting reliable? Yes, Linux VPS hosting is reliable, especially when offered by reputable providers. It combines affordability with robust performance and dedicated resources.


    Final Thoughts on Cheap Linux VPS Hosting

    Linux VPS hosting offers an excellent combination of affordability, performance, and flexibility, making it a suitable choice for projects of all sizes. Whether you’re a blogger, small business owner, or enterprise, Linux VPS hosting ensures your online presence is secure and scalable.

    For those looking to skip the research, HostBet’s affordable plans provide everything you need, from powerful resources to exceptional support. Empower your website with the perfect hosting solution today!

  • Which Hosting is Best for Blogging?

    Which Hosting is Best for Blogging?

    Blogging has become a cornerstone of the digital world, enabling individuals and businesses alike to share ideas, engage with audiences, and establish an online presence. To start a successful blog, choosing the right hosting service is crucial. Hosting is the foundation of your blog, determining its performance, reliability, and scalability. With countless hosting options available, it can be overwhelming to decide which is the best fit for your needs. This article dives deep into various hosting types, top providers, and factors to consider when selecting hosting for your blog.

    Types of Hosting for Blogging

    1. Shared Hosting

    Shared hosting is one of the most popular choices for beginners due to its affordability. With shared hosting, multiple websites share the same server resources such as bandwidth, storage, and CPU.

    Advantages:

    • Cost-effective
    • Easy to set up and manage
    • Includes basic features suitable for small blogs

    Disadvantages:

    • Limited resources and slower performance during traffic spikes
    • Security risks due to shared environment

    Best for: New bloggers or hobbyists who don’t expect high traffic volumes.

    2. Virtual Private Server (VPS) Hosting

    VPS hosting provides a dedicated portion of a server’s resources, offering better performance and control compared to shared hosting.

    Advantages:

    • More reliable performance
    • Greater control over server settings
    • Scalability for growing blogs

    Disadvantages:

    • More expensive than shared hosting
    • Requires some technical knowledge

    Best for: Intermediate bloggers or those with growing audiences.

    3. Dedicated Hosting

    Dedicated hosting gives you an entire server for your blog, ensuring top performance and full control.

    Advantages:

    • Superior performance and reliability
    • Full administrative access
    • Enhanced security

    Disadvantages:

    • High cost
    • Requires technical expertise

    Best for: Large blogs or websites with significant traffic and specific technical requirements.

    4. Managed WordPress Hosting

    Managed WordPress hosting is optimized for WordPress blogs, providing specialized tools and support.

    Advantages:

    • High performance tailored for WordPress
    • Automatic updates and backups
    • Enhanced security features

    Disadvantages:

    • Higher cost compared to shared hosting
    • Limited to WordPress websites

    Best for: Bloggers using WordPress who want hassle-free management.

    5. Cloud Hosting

    Cloud hosting uses a network of servers to distribute resources, ensuring high availability and scalability.

    Advantages:

    • Scalability to handle traffic fluctuations
    • High uptime and reliability
    • Pay-as-you-go pricing models

    Disadvantages:

    • Complex setup for beginners
    • Costs can increase with high usage

    Best for: Blogs expecting unpredictable traffic or rapid growth.

    6. Free Hosting

    Some platforms offer free hosting for blogs, such as WordPress.com or Blogger. These are often limited in functionality and branding options.

    Advantages:

    • No cost
    • Easy to set up

    Disadvantages:

    • Limited customization and control
    • Advertisements and branding by the hosting provider

    Best for: Hobby bloggers or those testing the waters.

    Factors to Consider When Choosing Hosting

    1. Performance

    Performance is critical for user experience and SEO rankings. Look for hosting providers with fast server response times, SSD storage, and optimized performance for your blogging platform.

    2. Uptime Guarantee

    Uptime refers to the amount of time your blog is accessible to visitors. Choose hosting services with a minimum uptime guarantee of 99.9%.

    3. Scalability

    As your blog grows, so will its resource needs. Opt for hosting that allows you to easily upgrade to higher plans or add more resources.

    4. Customer Support

    Reliable customer support can save you in critical situations. Check for 24/7 support through live chat, email, or phone.

    5. Security

    Your hosting provider should offer robust security features such as SSL certificates, firewalls, and regular malware scans.

    6. Ease of Use

    For beginners, hosting providers with intuitive control panels like cPanel or custom dashboards are ideal.

    7. Cost

    Compare pricing plans and ensure they fit your budget, keeping in mind renewal costs and additional fees.

    8. Blogging Platform Compatibility

    If you’re using a specific platform like WordPress, ensure the hosting provider supports and optimizes for it.

    Top Hosting Providers for Blogging

    1. Bluehost

    Bluehost is a popular choice for bloggers, especially WordPress users.

    Key Features:

    • Official WordPress recommendation
    • Free domain for the first year
    • One-click WordPress installation
    • 24/7 customer support

    Best for: Beginner and intermediate bloggers.

    2. SiteGround

    SiteGround is known for its excellent performance and customer support.

    Key Features:

    • Managed WordPress hosting
    • Free daily backups
    • Advanced caching options
    • Excellent uptime

    Best for: WordPress bloggers who prioritize speed and support.

    3. HostGator

    HostGator offers affordable and reliable hosting plans.

    Key Features:

    • Unmetered bandwidth
    • 45-day money-back guarantee
    • Easy website builder
    • 24/7 support

    Best for: Budget-conscious bloggers.

    4. WP Engine

    WP Engine specializes in managed WordPress hosting for serious bloggers.

    Key Features:

    • Premium performance optimization
    • Automatic WordPress updates
    • Enhanced security features
    • Developer-friendly tools

    Best for: Professional WordPress bloggers.

    5. A2 Hosting

    A2 Hosting focuses on speed and performance.

    Key Features:

    • Turbo servers for faster loading
    • Free site migrations
    • Anytime money-back guarantee
    • Developer-friendly options

    Best for: Bloggers who need high-speed hosting.

    6. DreamHost

    DreamHost offers flexible plans with a focus on WordPress.

    Key Features:

    • 100% uptime guarantee
    • Free domain and SSL certificate
    • Unlimited traffic
    • Custom control panel

    Best for: Bloggers seeking long-term reliability.

    Recommendations Based on Blog Type

    • Personal Blogs: Shared hosting with providers like Bluehost or HostGator.
    • Niche Blogs: Managed WordPress hosting with SiteGround or WP Engine.
    • Business Blogs: VPS or Cloud hosting from A2 Hosting or DreamHost.
    • High-Traffic Blogs: Dedicated hosting or Cloud hosting with scalable providers like WP Engine or SiteGround.

    Final Thoughts

    The best hosting for blogging depends on your specific needs, budget, and future goals. If you’re just starting out, shared hosting with Bluehost or HostGator is an affordable and reliable choice. For WordPress users who value performance and support, SiteGround or WP Engine can be excellent options. As your blog grows, consider upgrading to VPS or Cloud hosting for more resources and flexibility.

    Remember, hosting is an investment in your blog’s success. Choose a provider that aligns with your goals, and don’t hesitate to switch as your needs evolve. Happy blogging!